So the "Lol Cats" website inspired me for this. I have a whole album of them on my facebook page and clearly have far to much fun coming up with my captions. The sooner Simon accepts the fact that his mommy is a huge dork the happier he will be... Enjoy!
Thursday, October 29, 2009
Lol Simon
Posted by Emily at 11:29 AM 0 comments
Labels: humor, photography
Thursday, October 22, 2009
Coffee Cozy...
Needles: US size 9
Yarn: 2 colors, "medium, worsted" yarn (I don't know how much it actually takes...but it isn't too much.)
Stitches: Knit and Purl
Cast on 12 stitches using both colors together.
Row 1: Knit
Row 2: Purl
Repeat until it's the desired length. This is where my saved cardboard sleeve came in handy. I could measure what I'd knitted up against the sleeve and see how long it was. Cast off when it's barely smaller than the sleeve. Leave at least one of the strands of yard nice and long.
Using a tapestry needle, sew the two ends together with your long strand of yarn.
Enjoy your coffee and decrease your carbon footprint! :) It's also a great way to use up the little bits of yarn in your stash.
Posted by Emily at 9:56 AM 0 comments
Thursday, October 15, 2009
My First "Ikea Hack"
My husband came across the bog Ikea Hacker and found a lot of really interesting things. It got us thinking of things that we could "hack." I was inspired for the candle I "hacked" below by something I saw on the site. Here's how I did it...
This is what you need...

I decided that I wanted my candle "layered" with different shades of the same color. But you could totally do it all one color. That's what Tony thought I was going to do. Anyway...
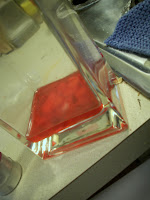
 Next, take your tea lights -- I started with the light red ones -- and cut them in half to get them out of their holder and easily get the wick out. I used 4 of them for each layer. After getting them out, I chopped them into small chunks and put it all in the microwave to melt. The first layers, I melted directly in the vase but subsequent ones I used a microwave safe bowl and just poured the wax into the vase
Posted by Emily at 5:30 PM 0 comments
Thursday, October 1, 2009
A New Cleaning Tip...
Anyone who knows me KNOWS that I'm no Suzy-homemaker. My house is often in disarray and always has been. (I'm striving to clean, purge, and re-organize. Really, I am!) But for once...I'm proud to say that I have a cleaning tip! And one that I came up with!
I made another cake for a family dinner this past weekend... Sorry...I couldn't resist posting an image of my finished product. It's not what I wanted it to look like...but I'm proud nonetheless.
If you've ever done cake decorating you've used piping bags and various tips and possibly couplers. The tips are kind of a pain to clean and the piping bags can be a pain to dry. Herein lies my tip...
Many moms -- whether breast or formula feeding -- use bottles and have a bottle brush like this...
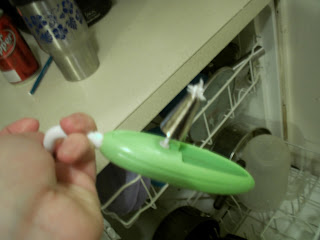
I found in cleaning my decorating tips that the "nipple cleaning" end of the bottle brush works GREAT for getting the frosting out of the tip. Like this..
If you have one of those dishwasher baskets for nipples that would work well too...I just don't happen to have one.
Now I started drying my pastry bags like this back when I was taking my cake decorating class. It works great and I figured I'd share... What you use depends on the size of the bag. This time I took an empty 2 liter pop bottle and an empty pop can and opened up my cleaned bags on top of them like this...
I've also used various cups and a travel mug and 20 oz bottles. They all work great and the bags dry really well.
Posted by Emily at 1:48 PM 0 comments
Labels: cakes, cleaning tips, decorating


